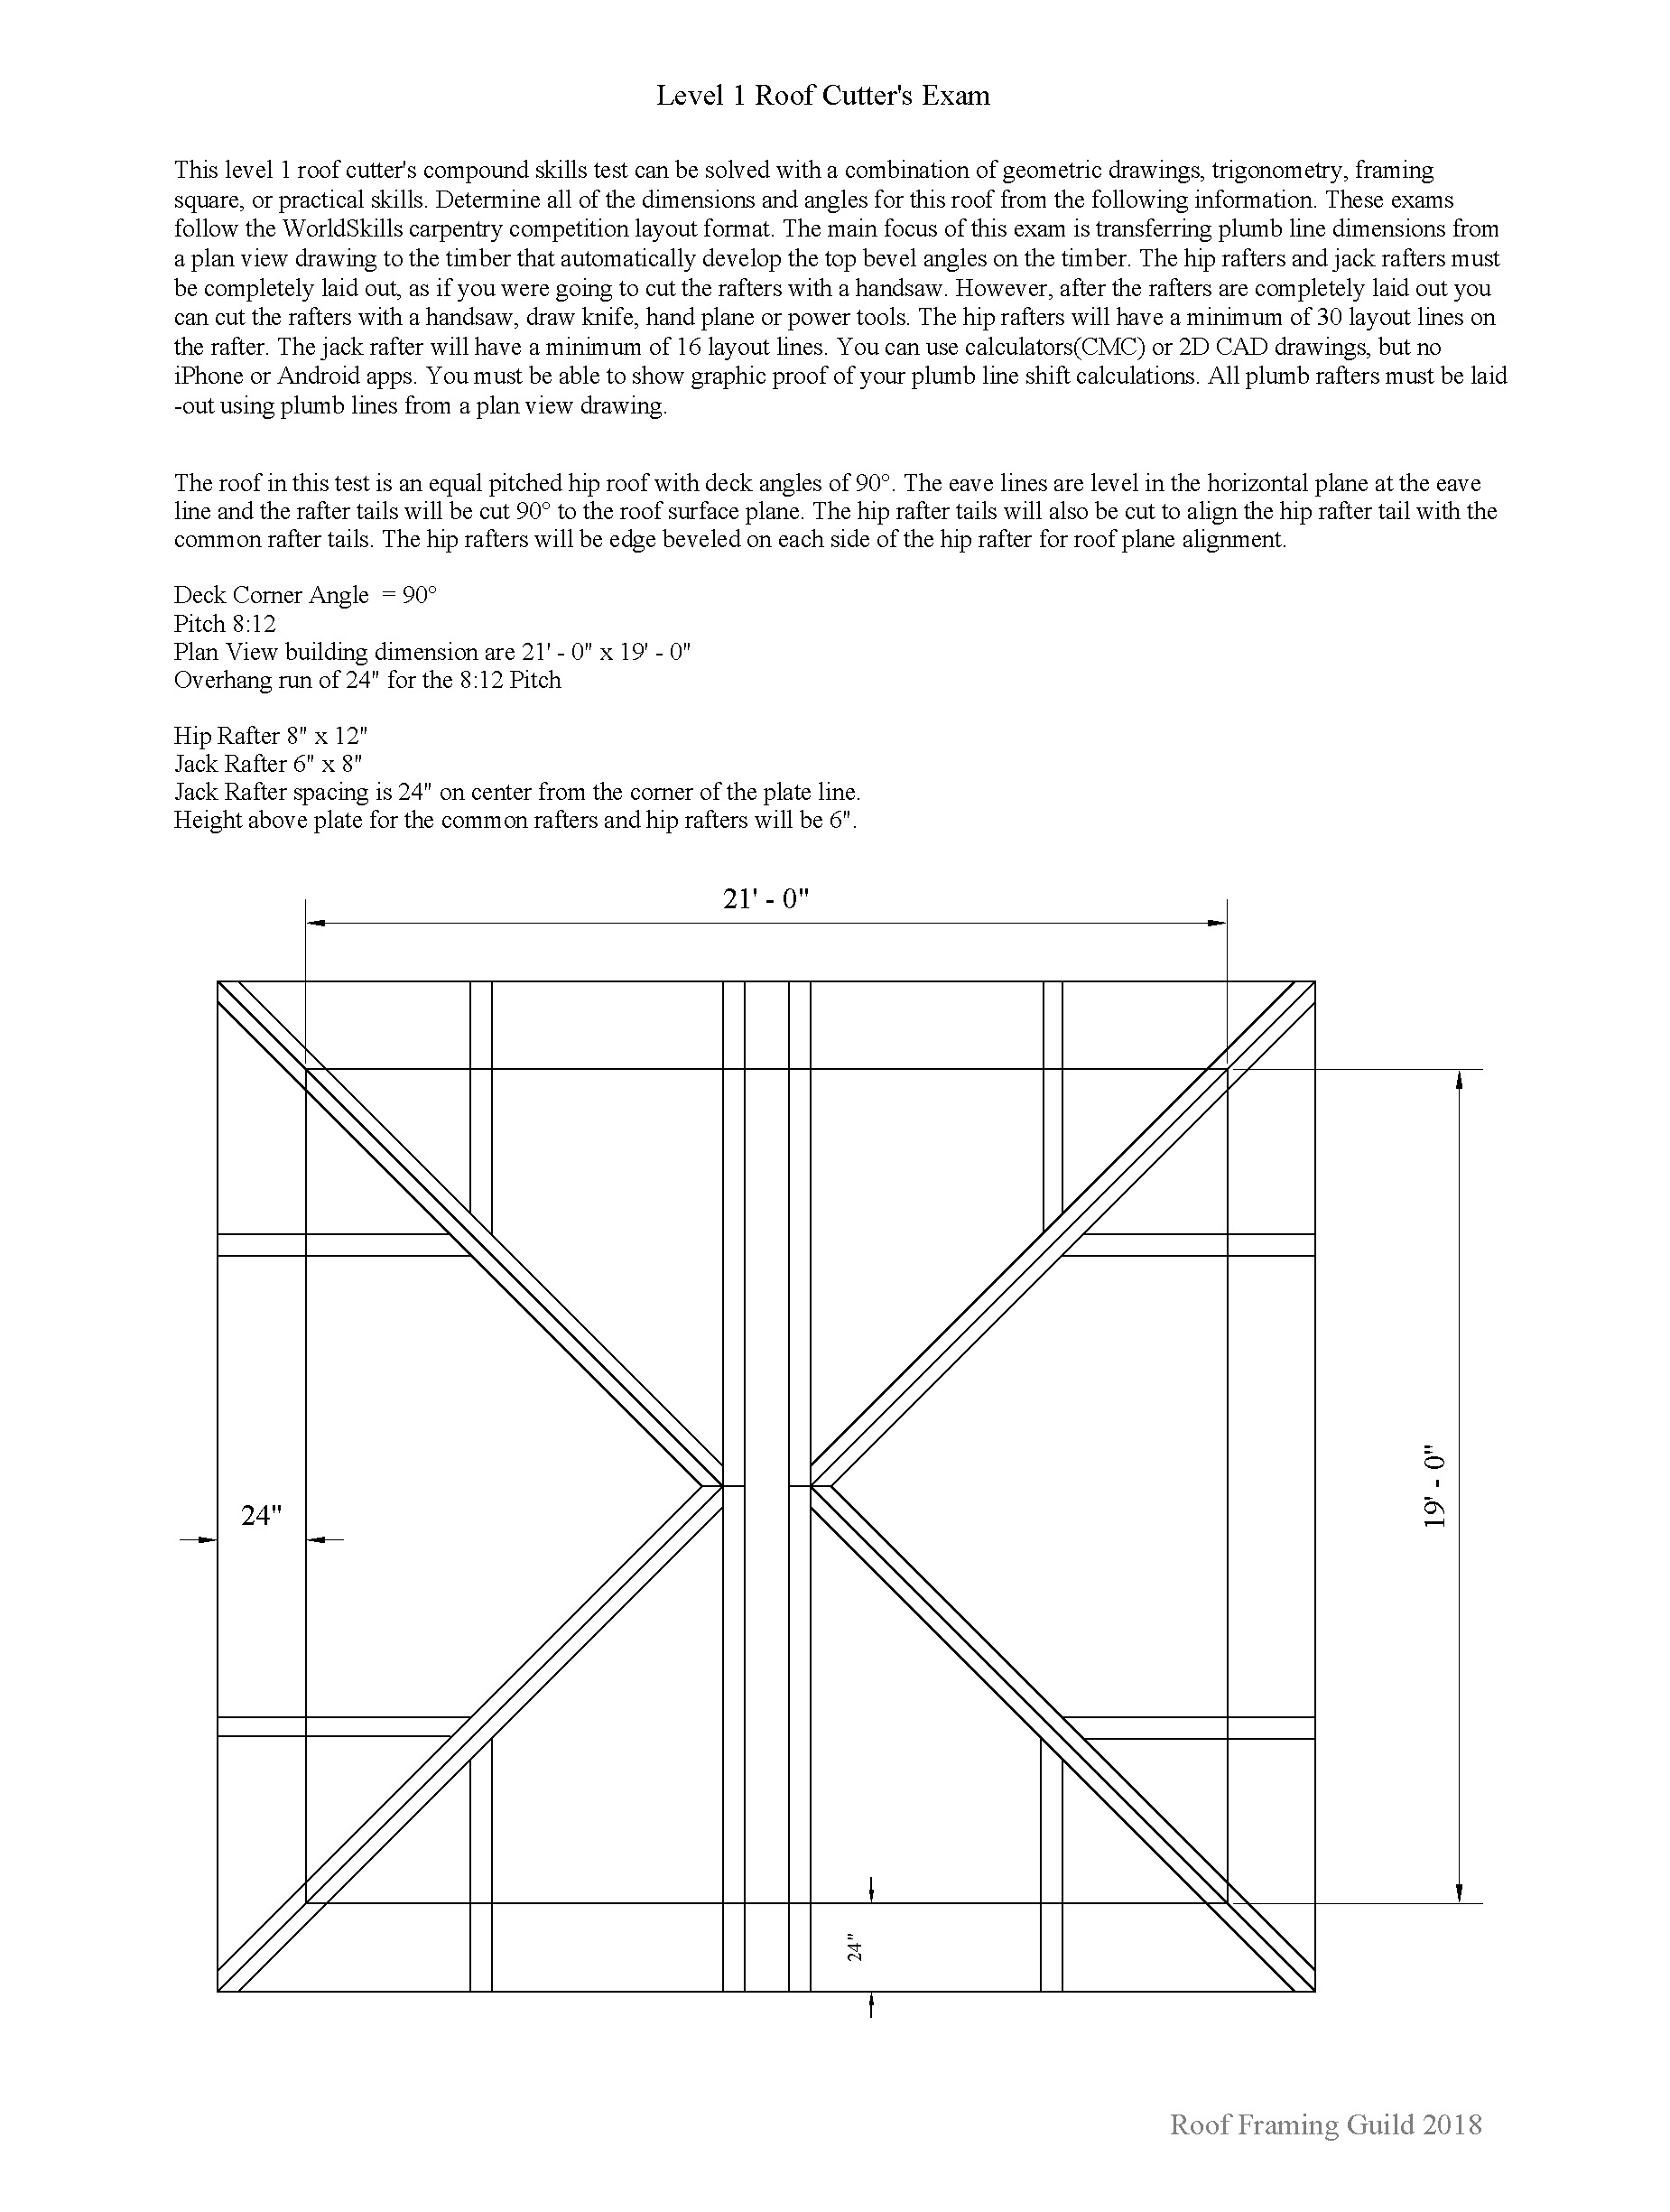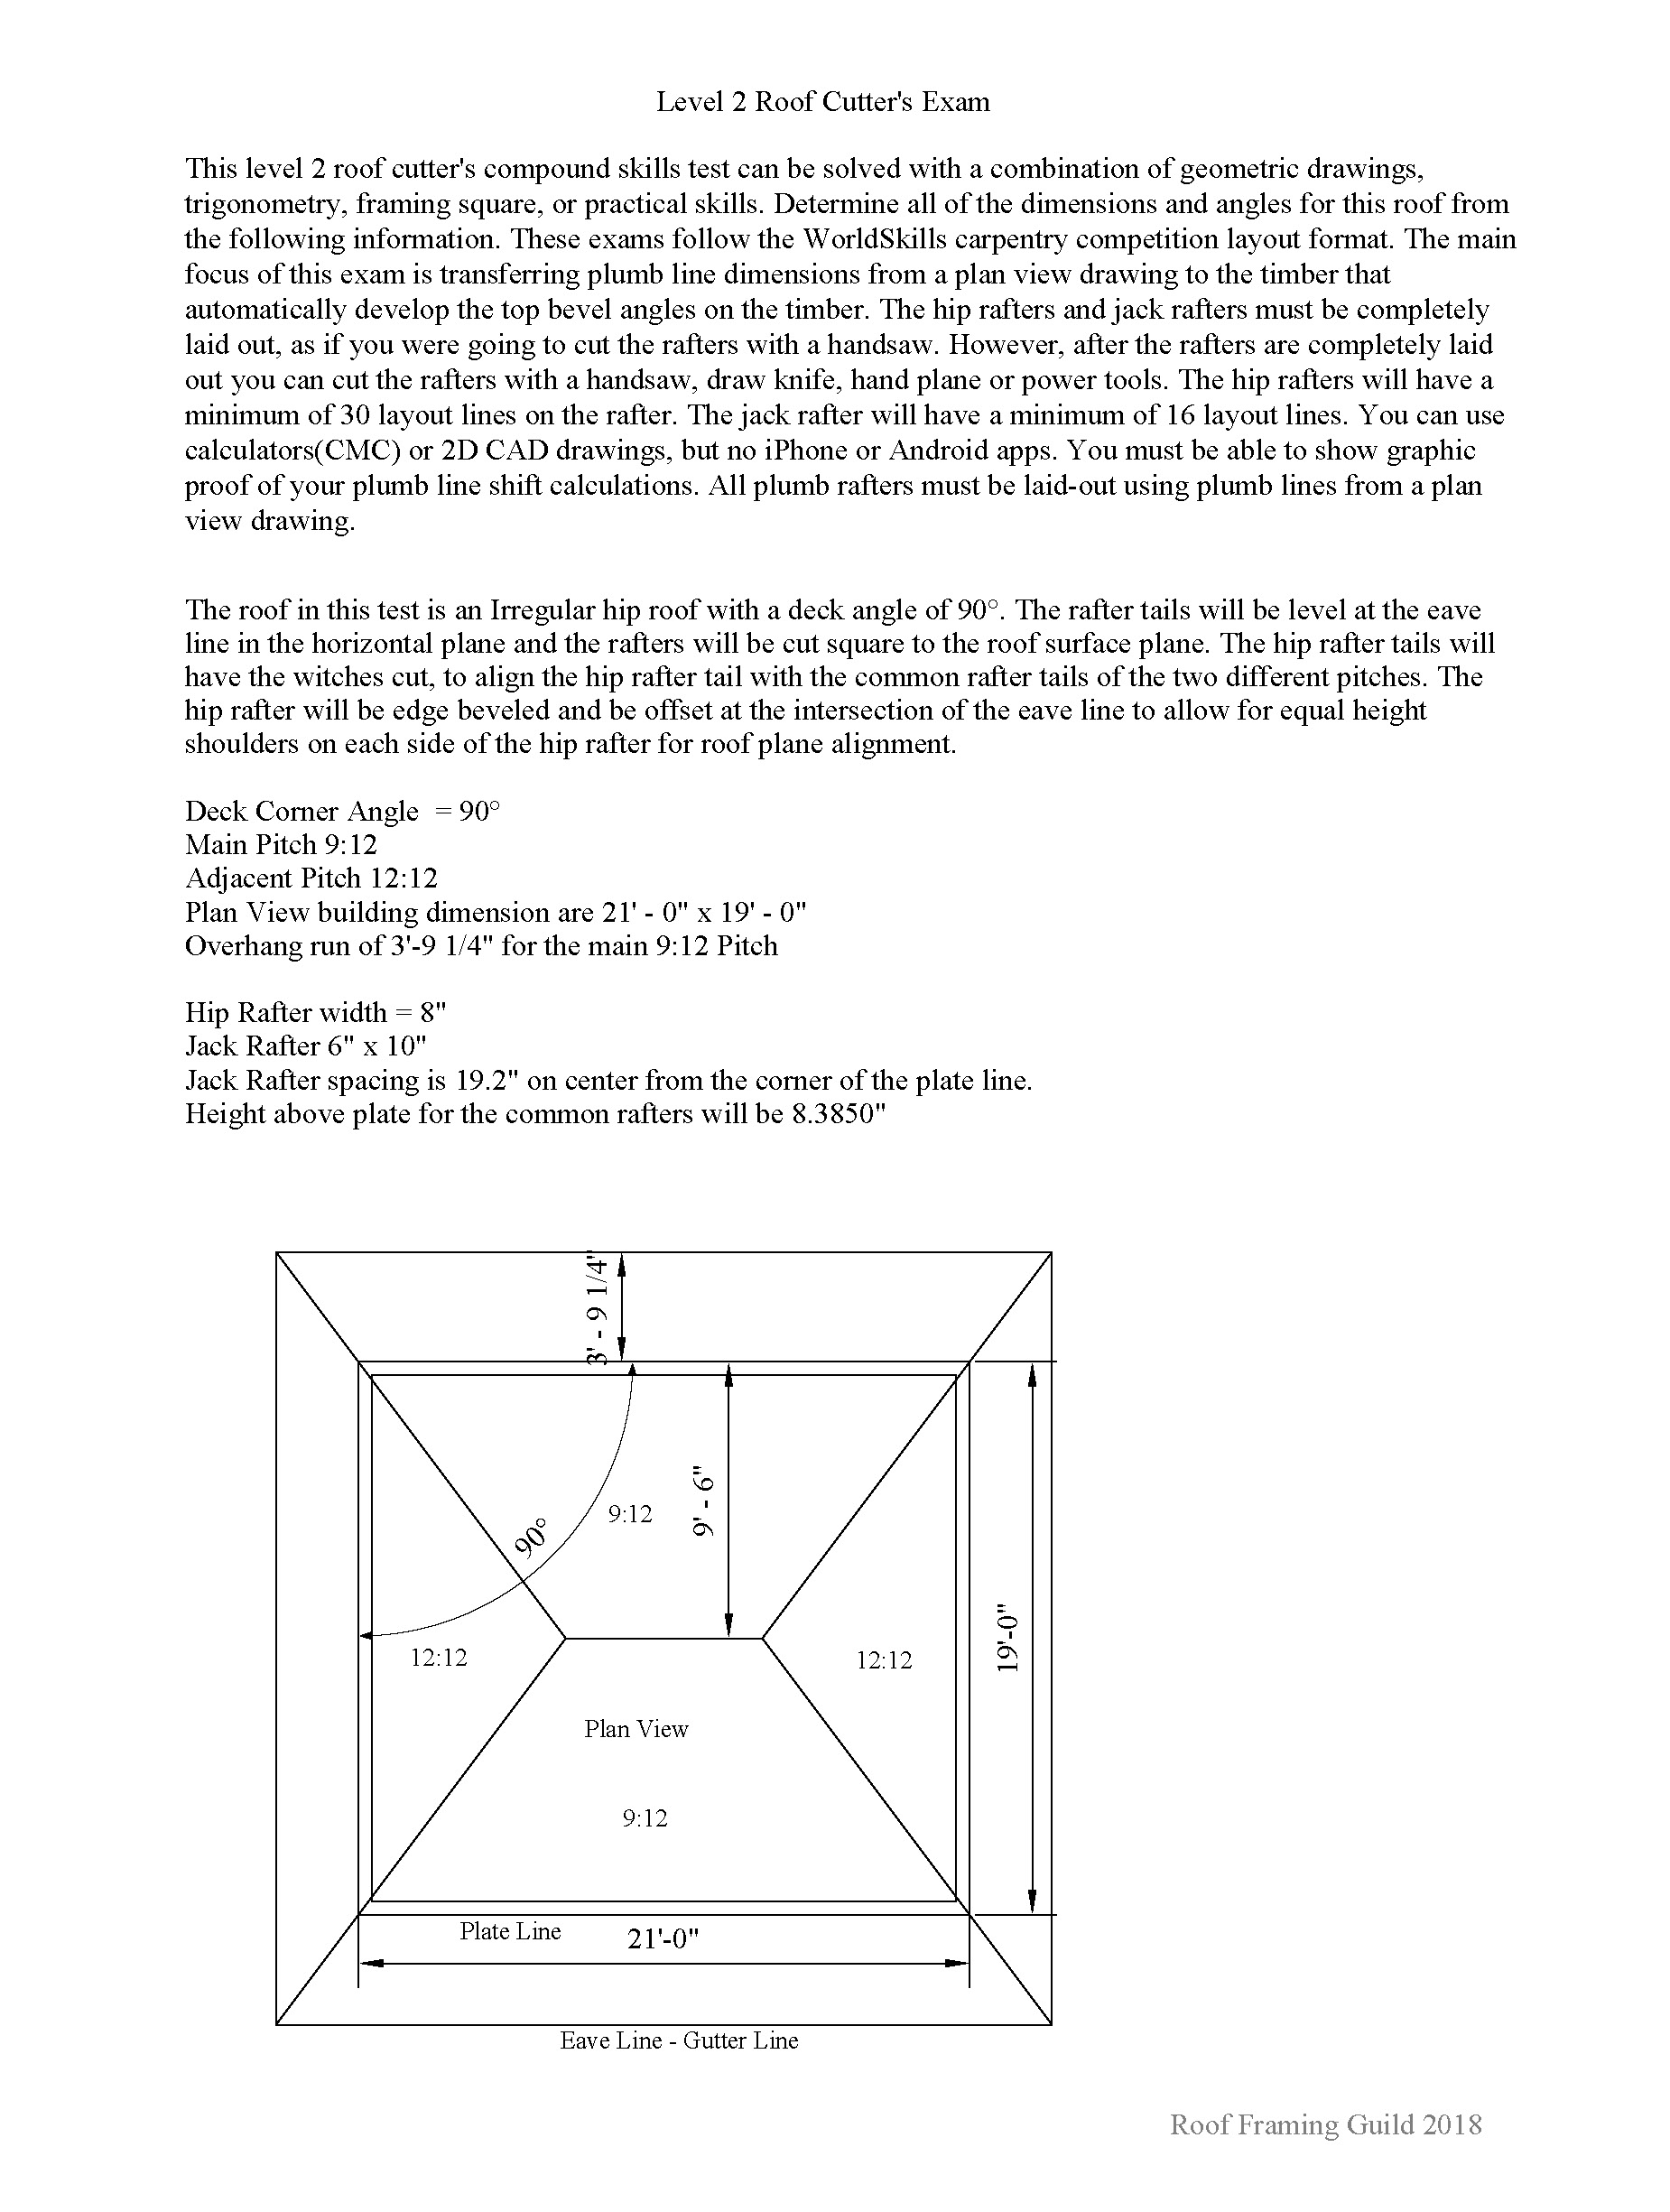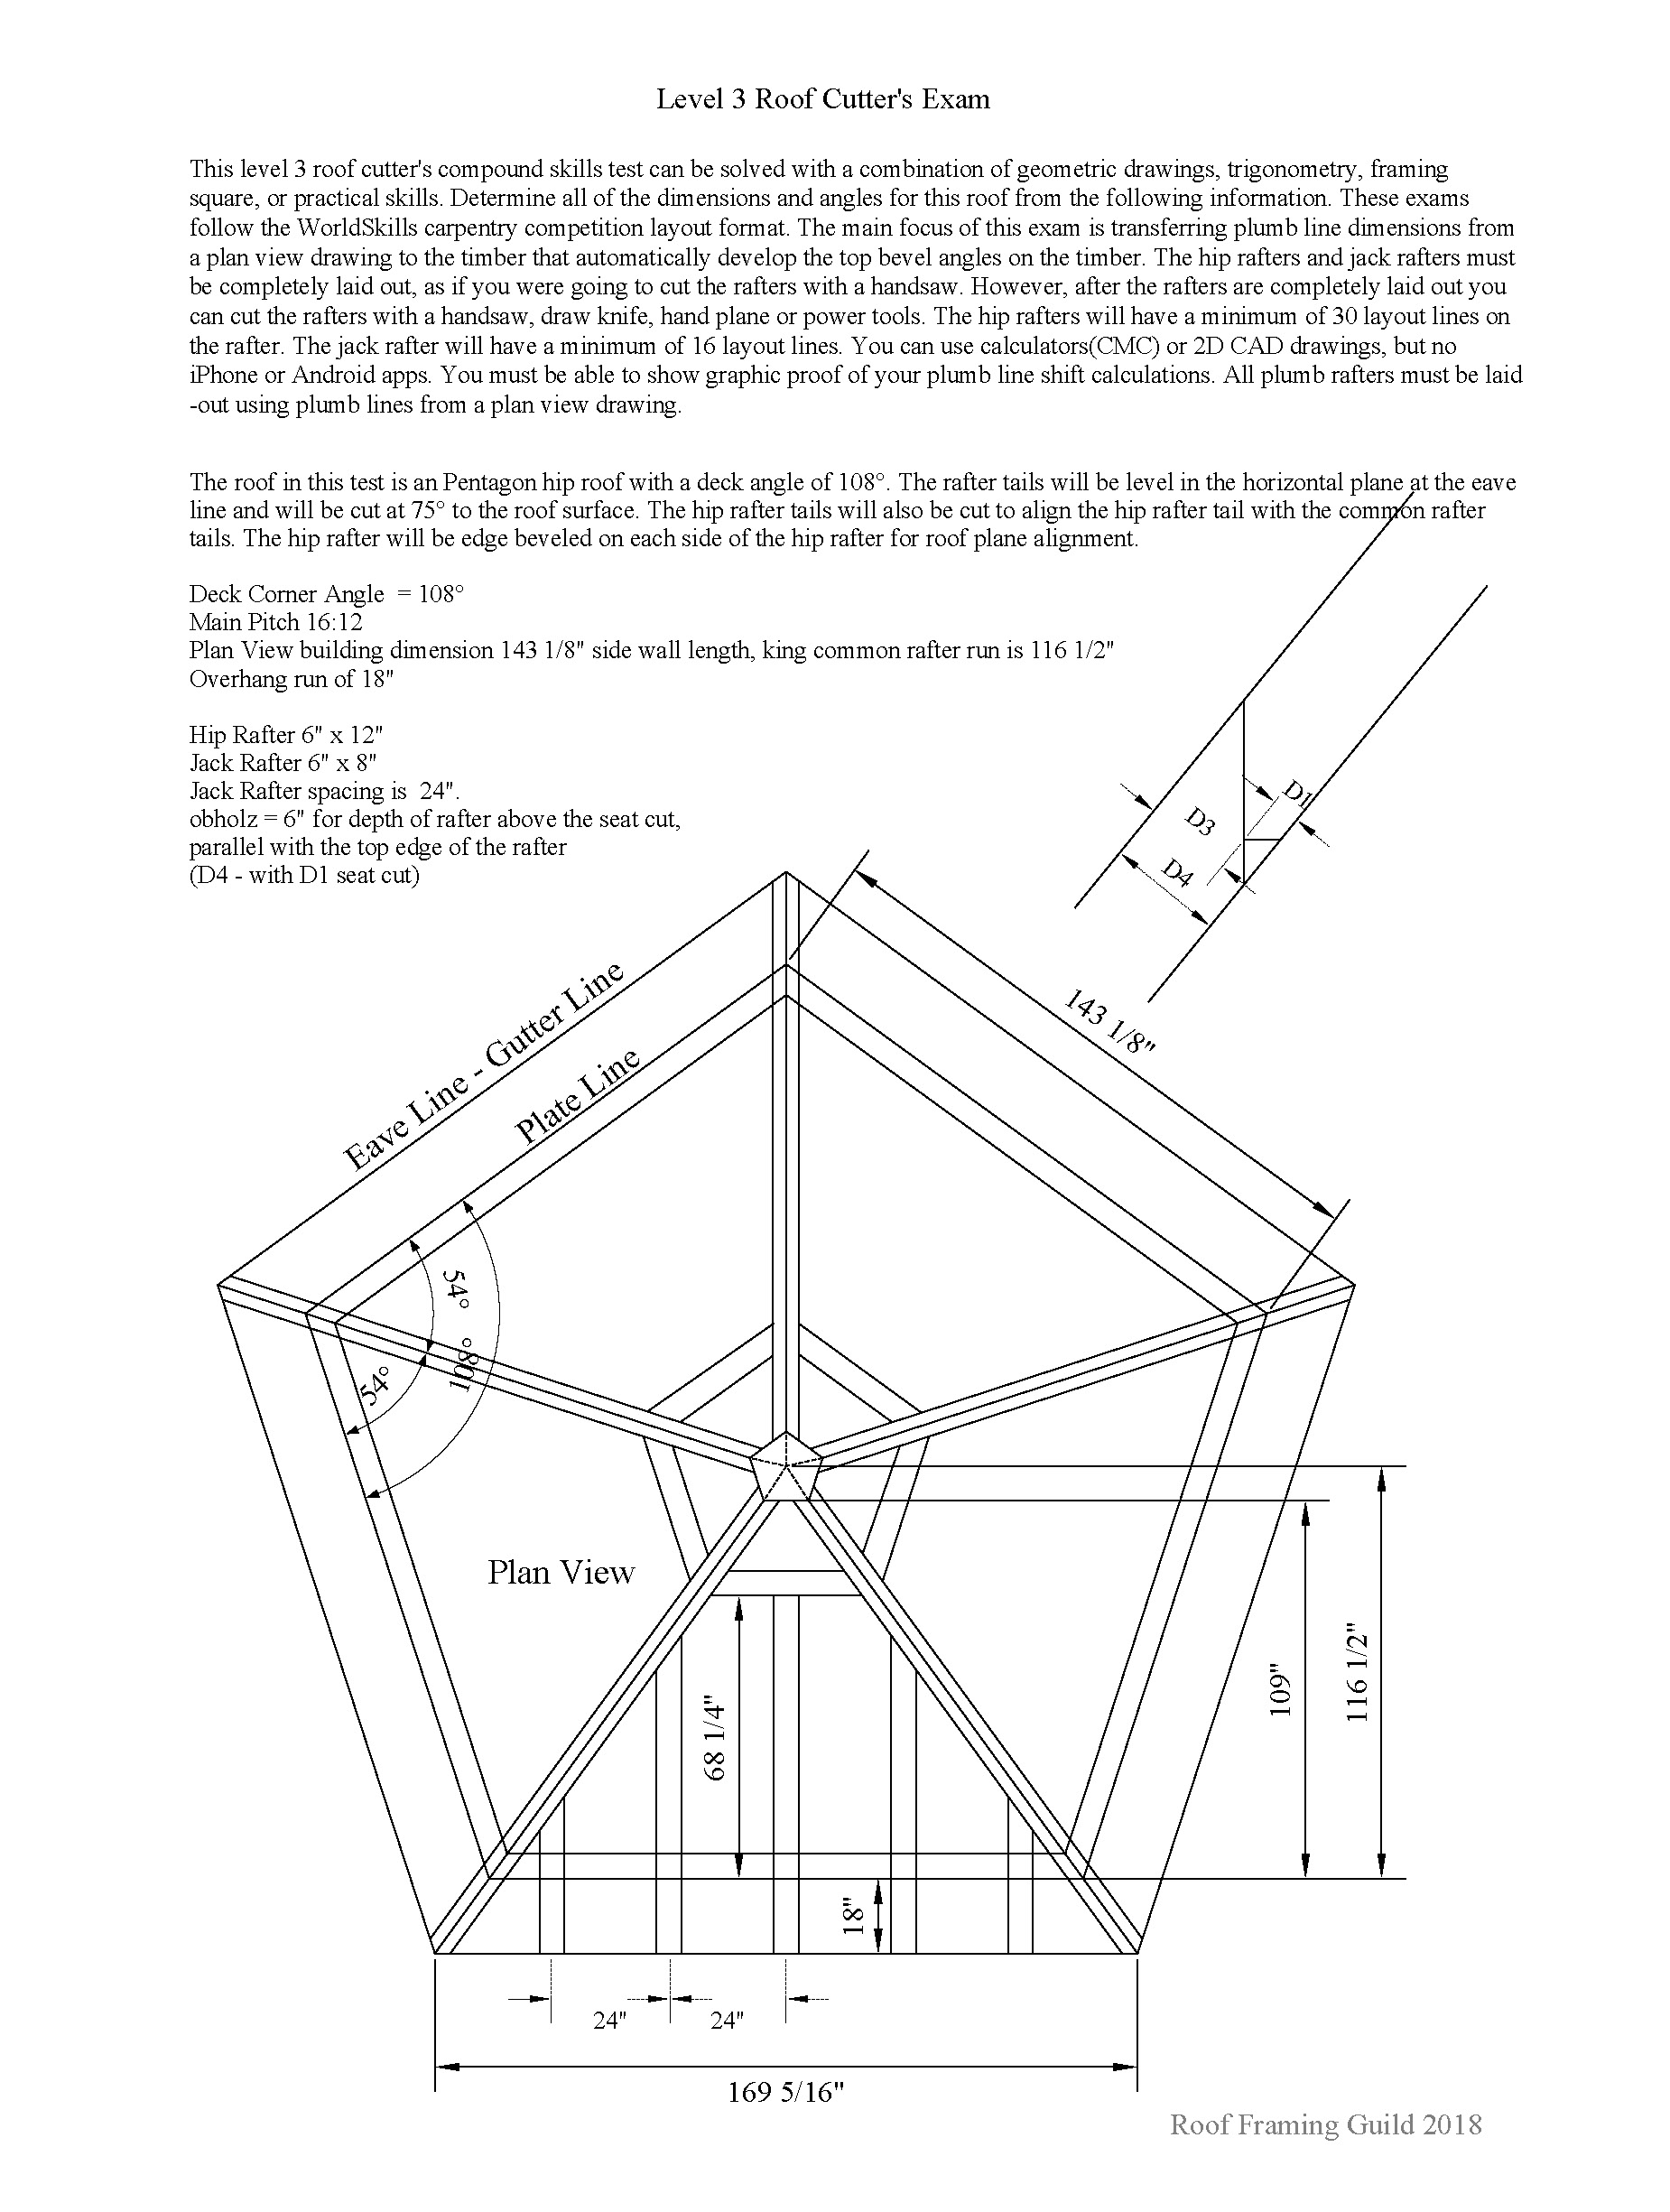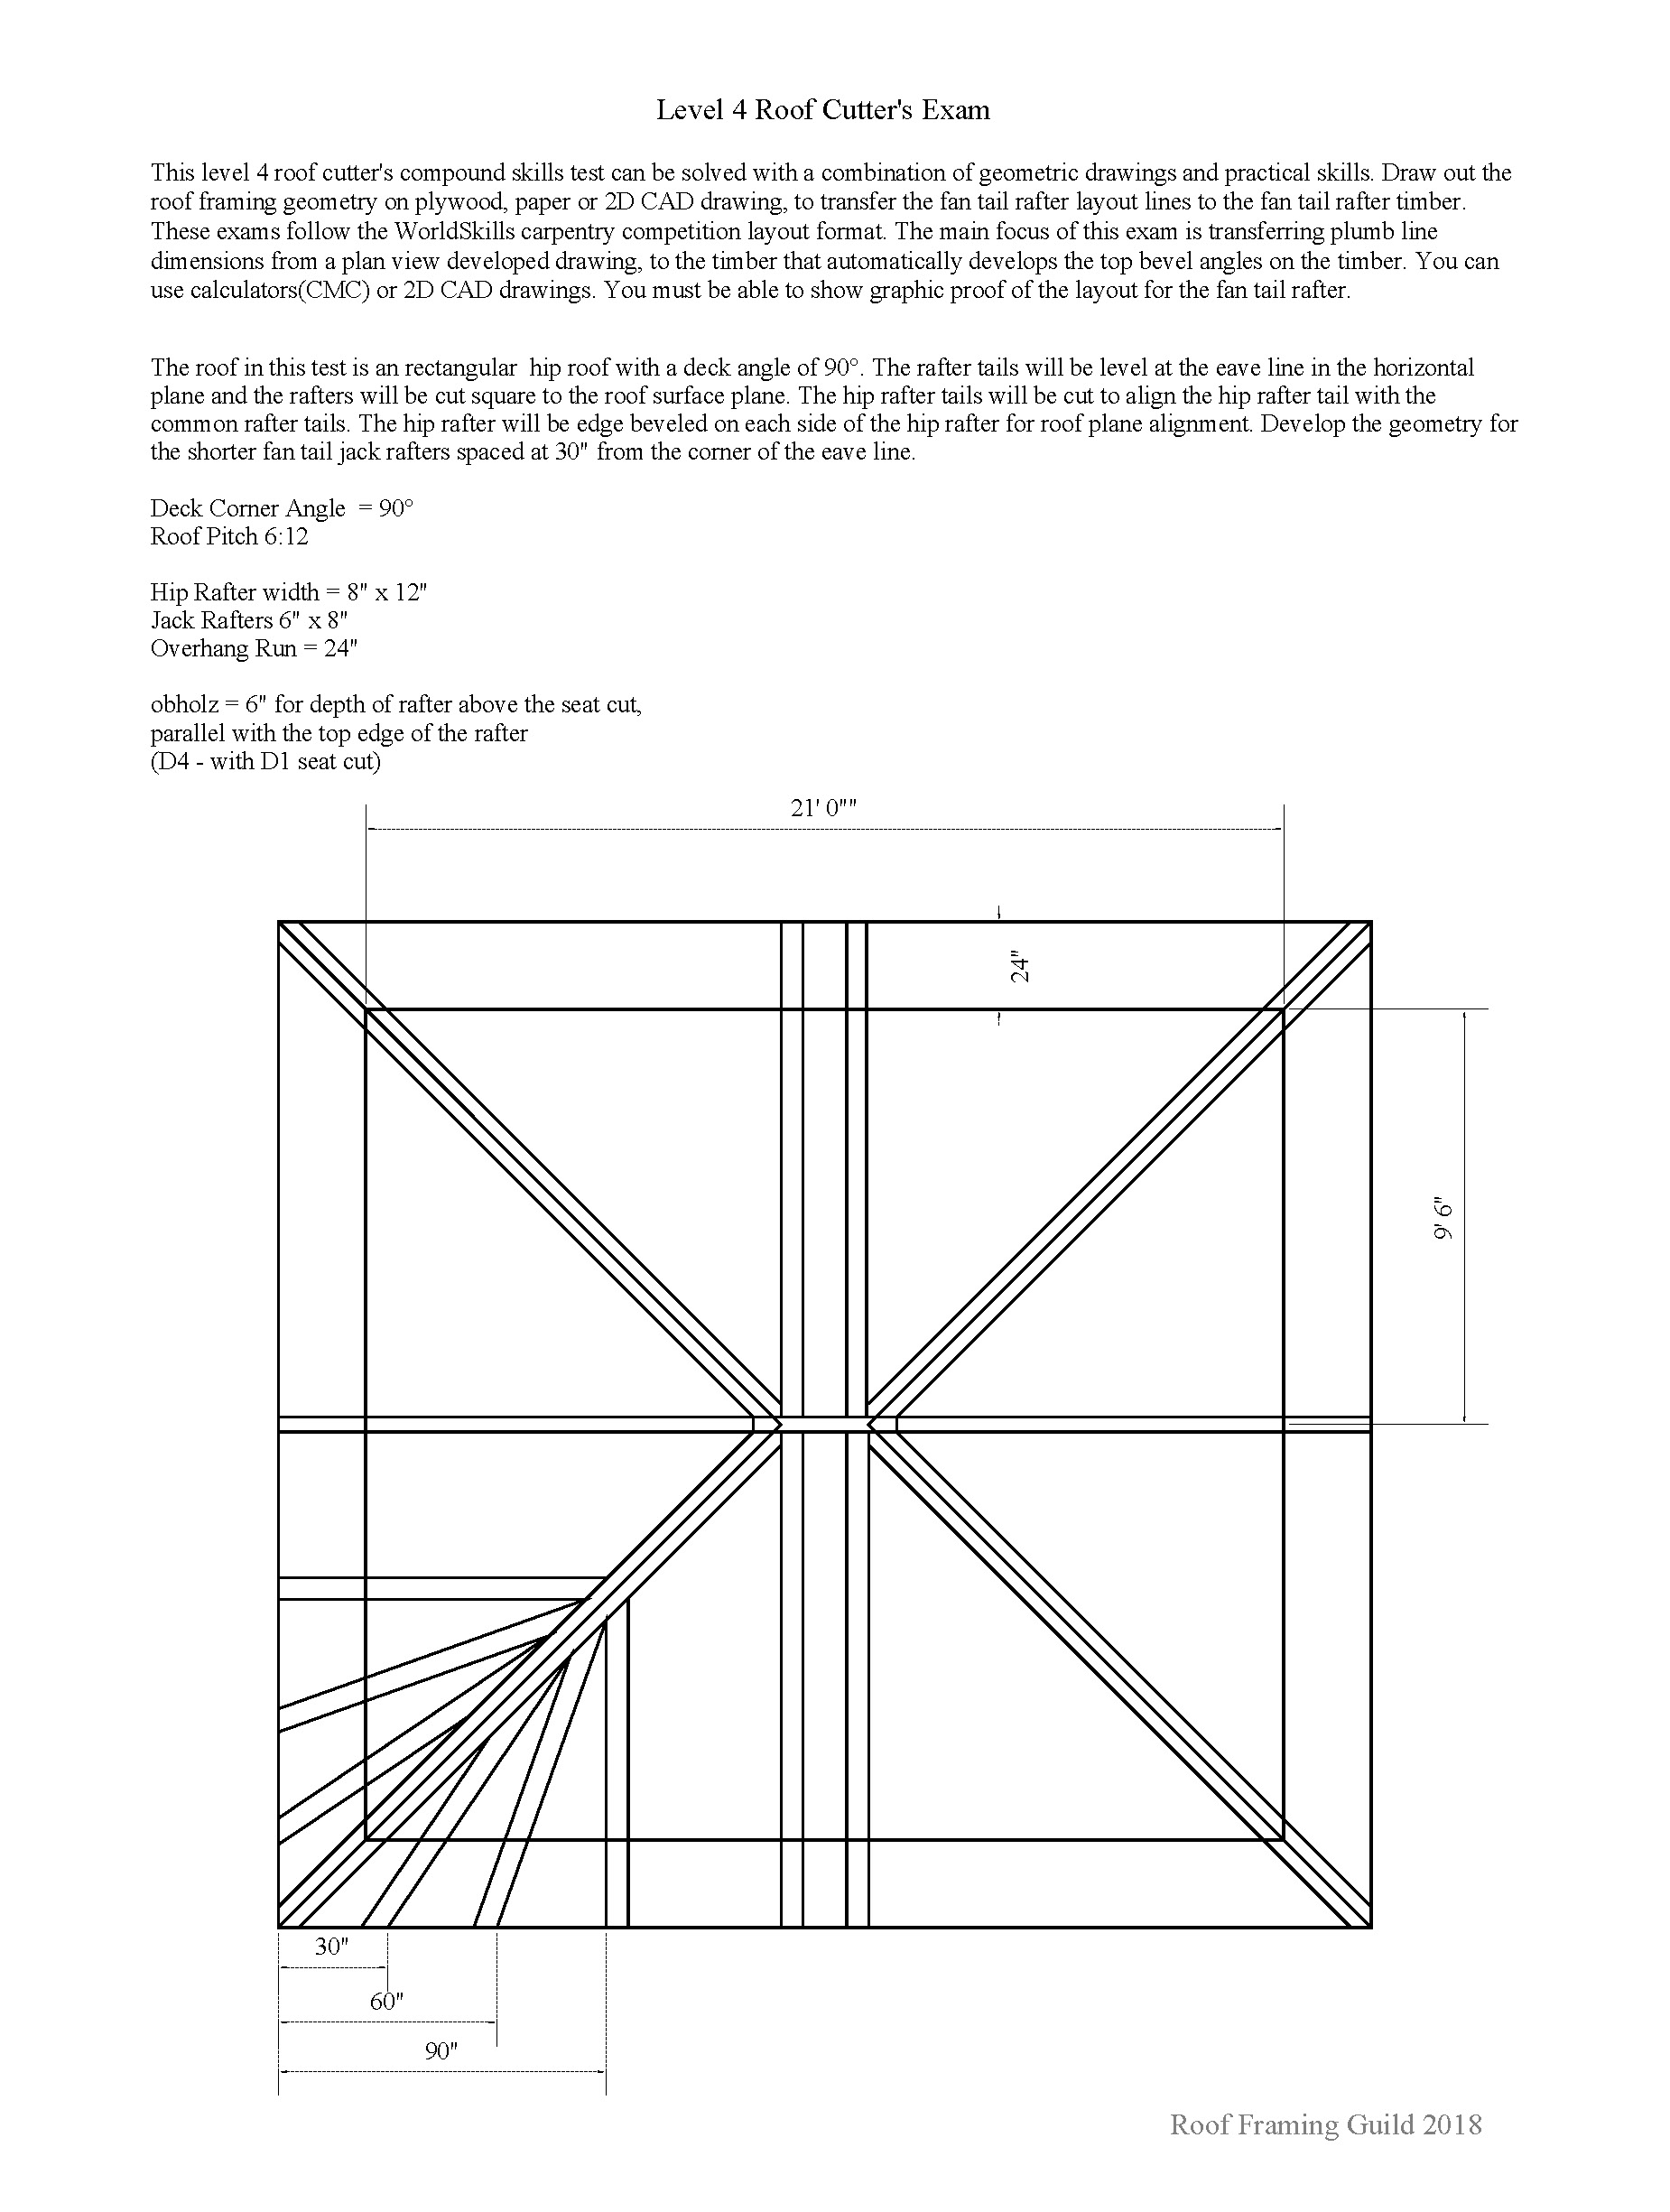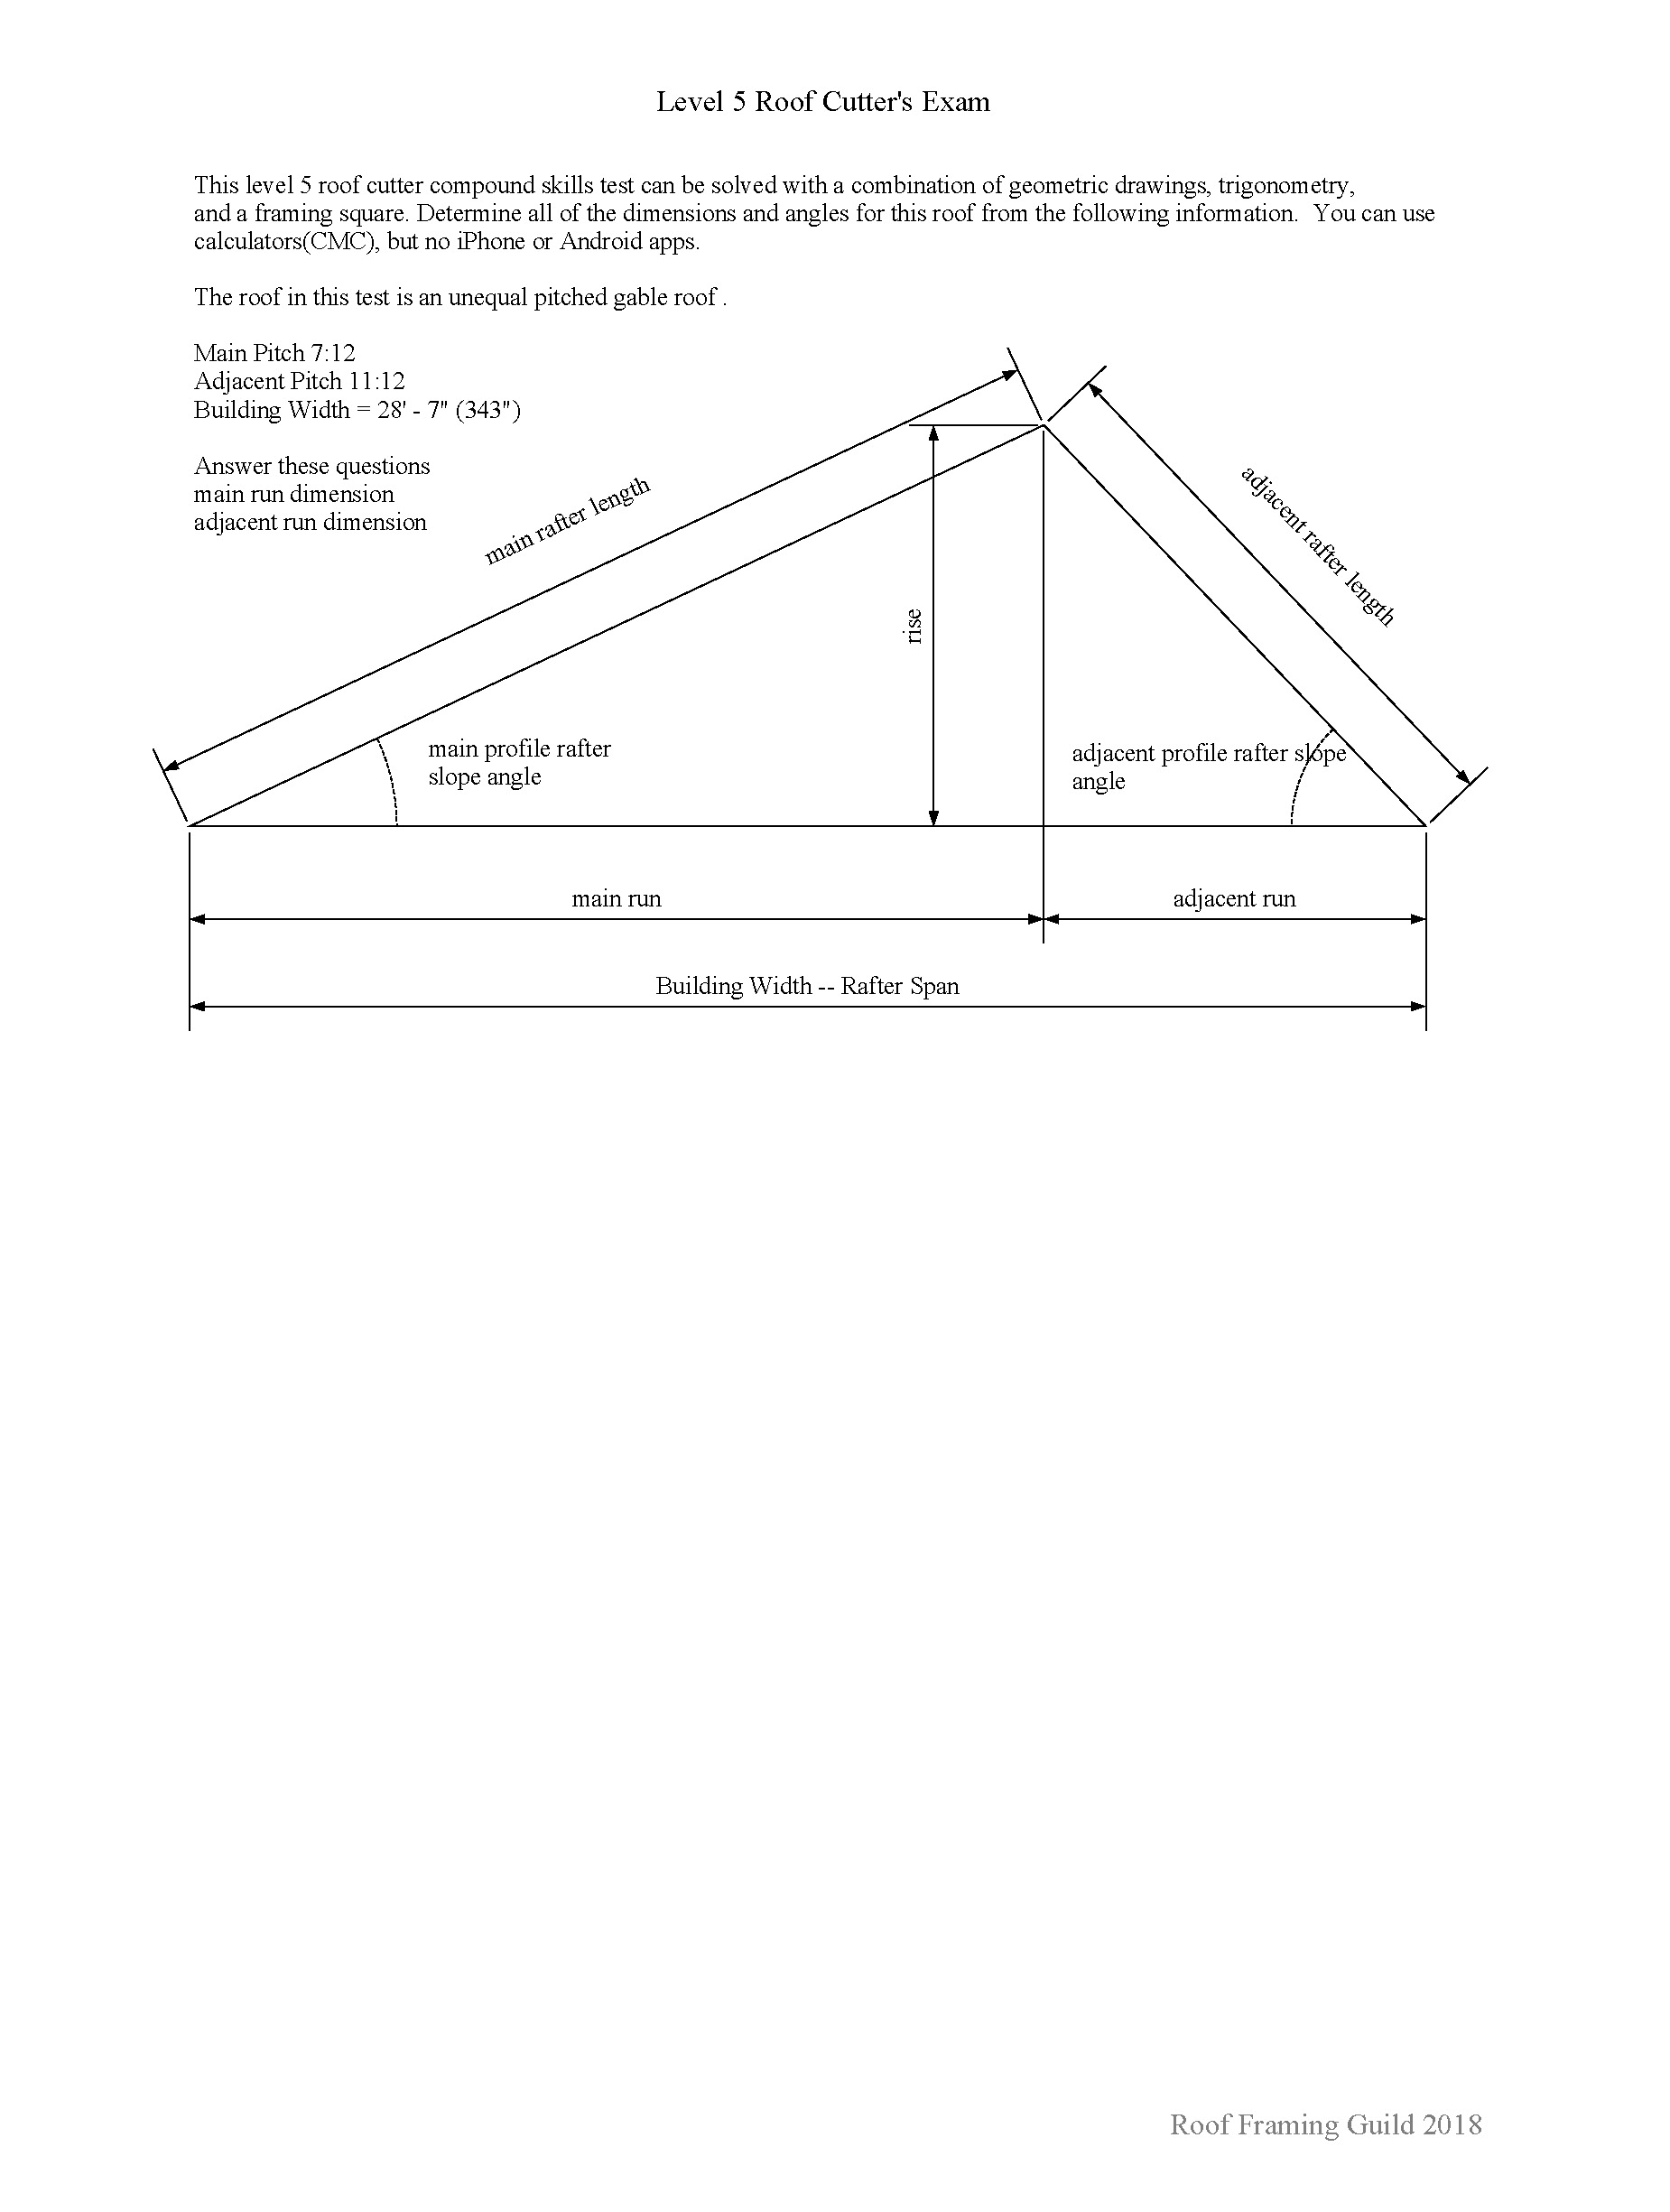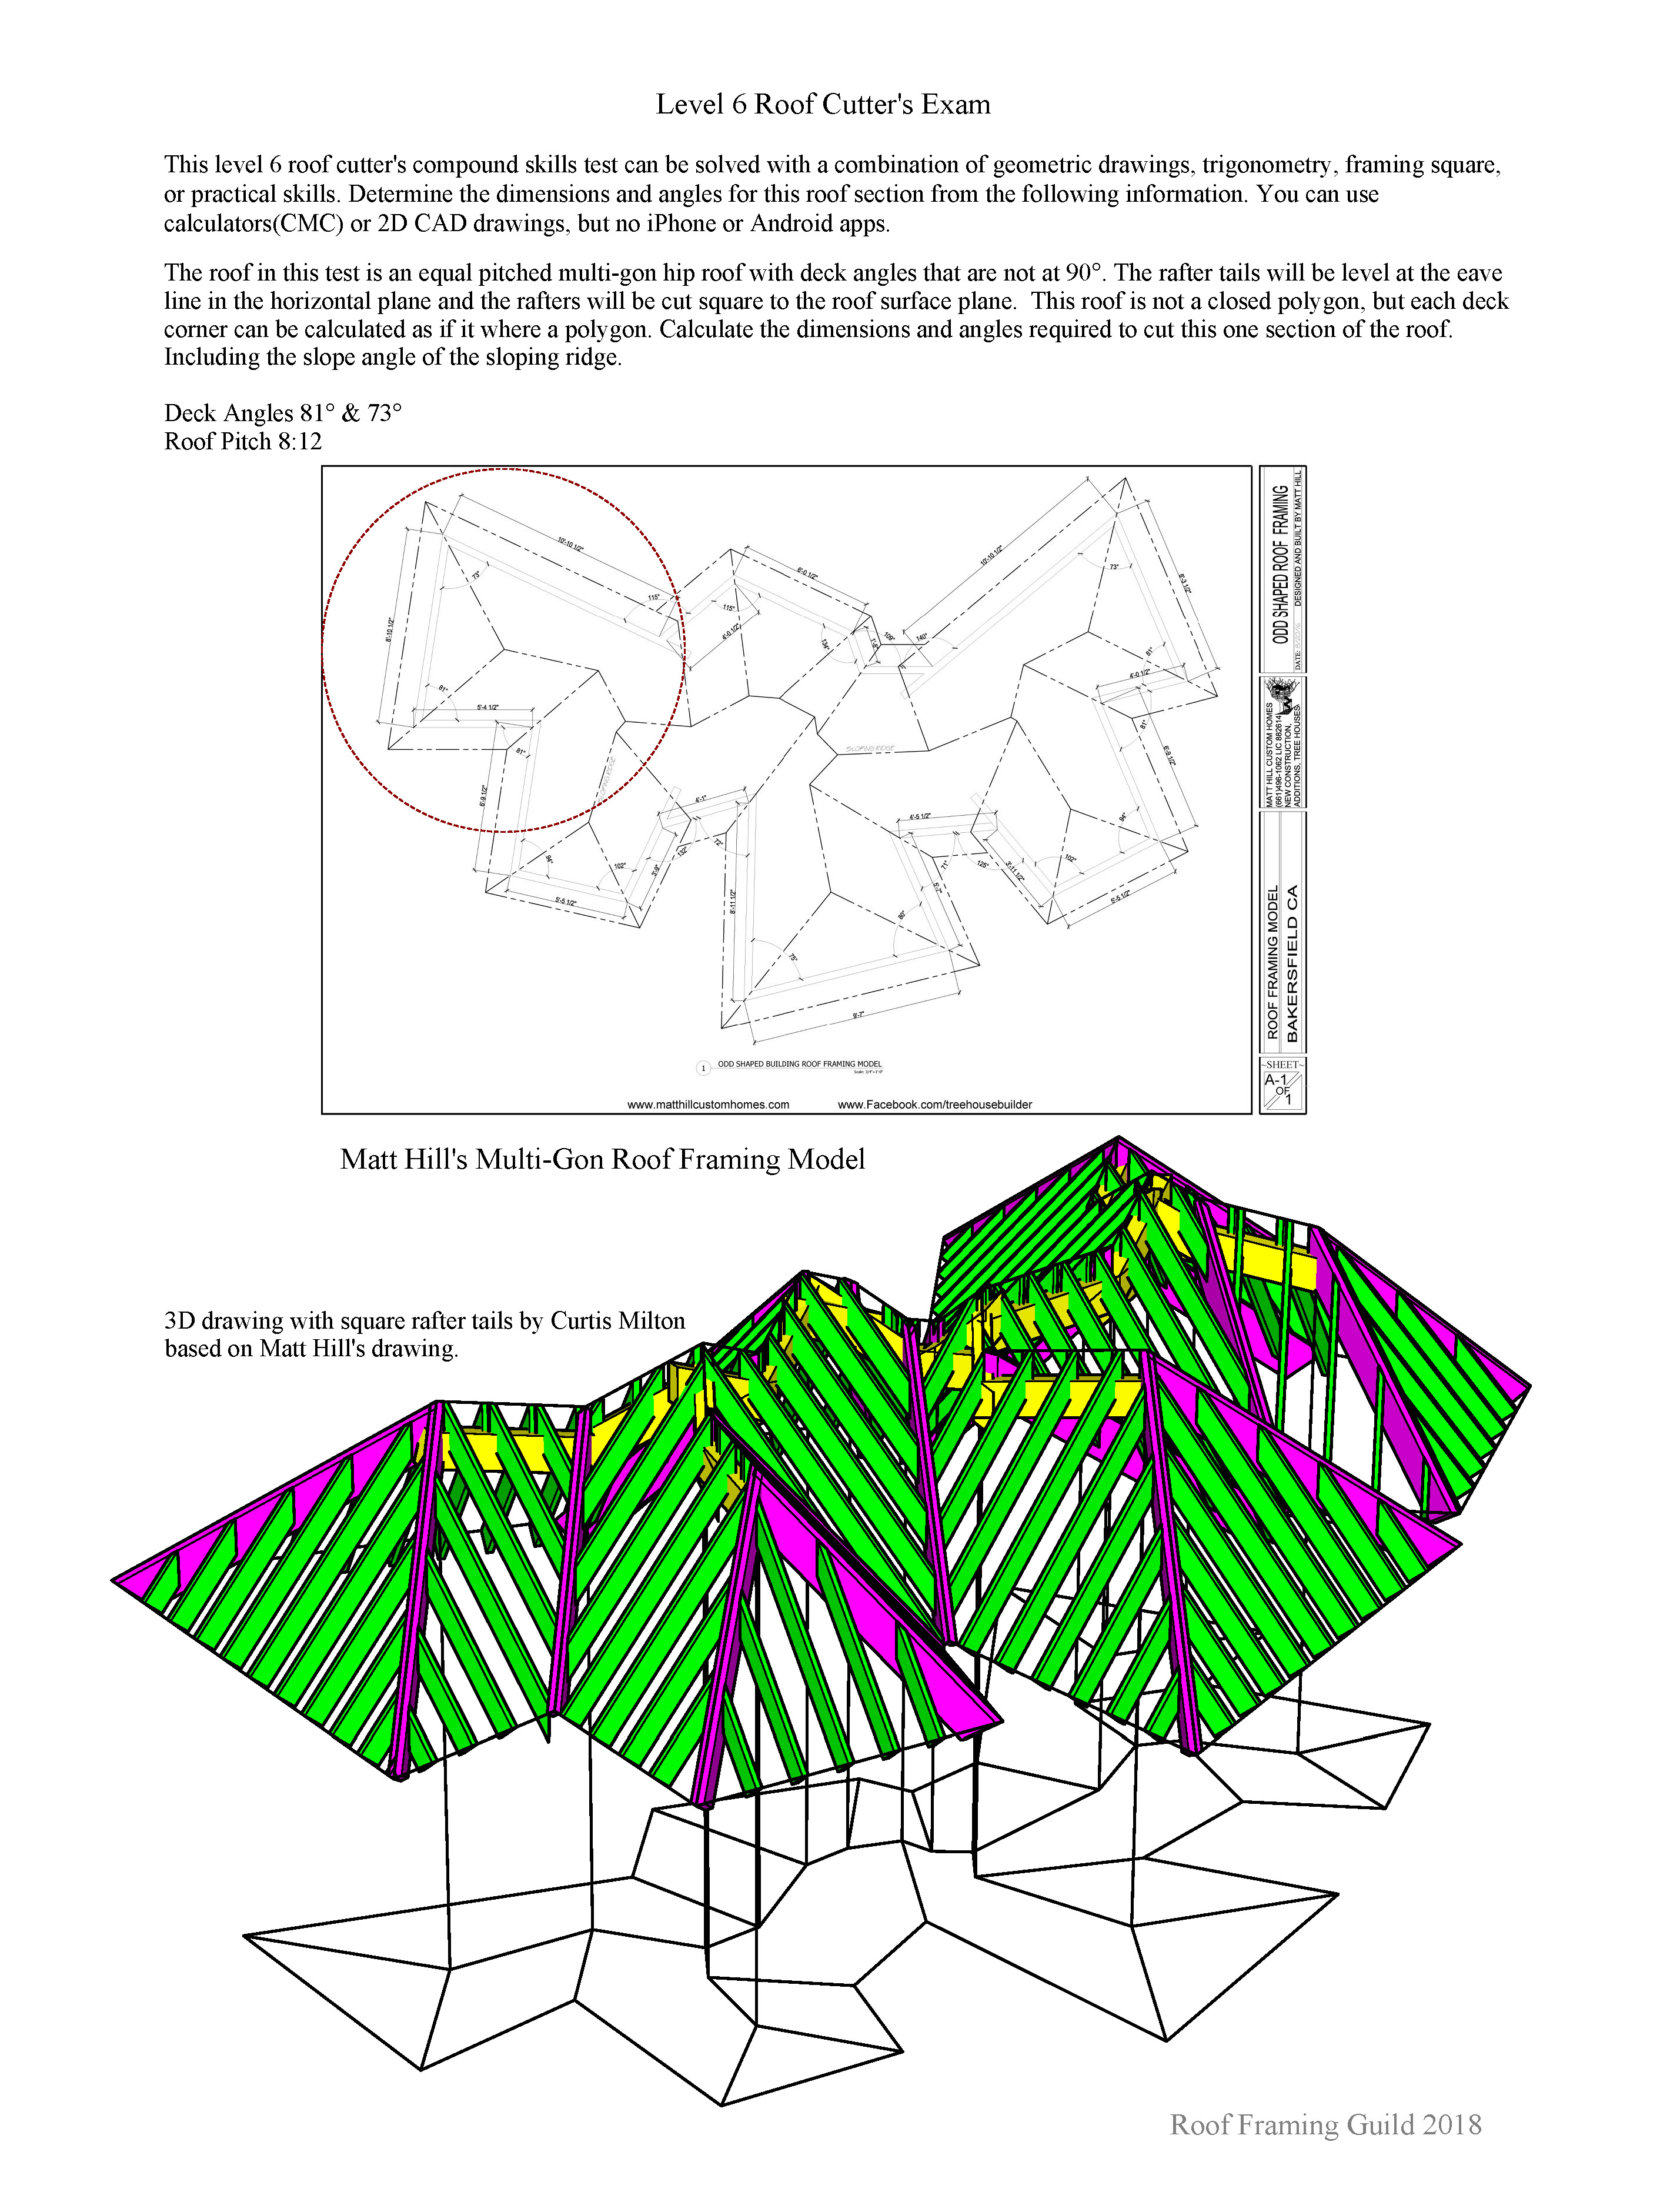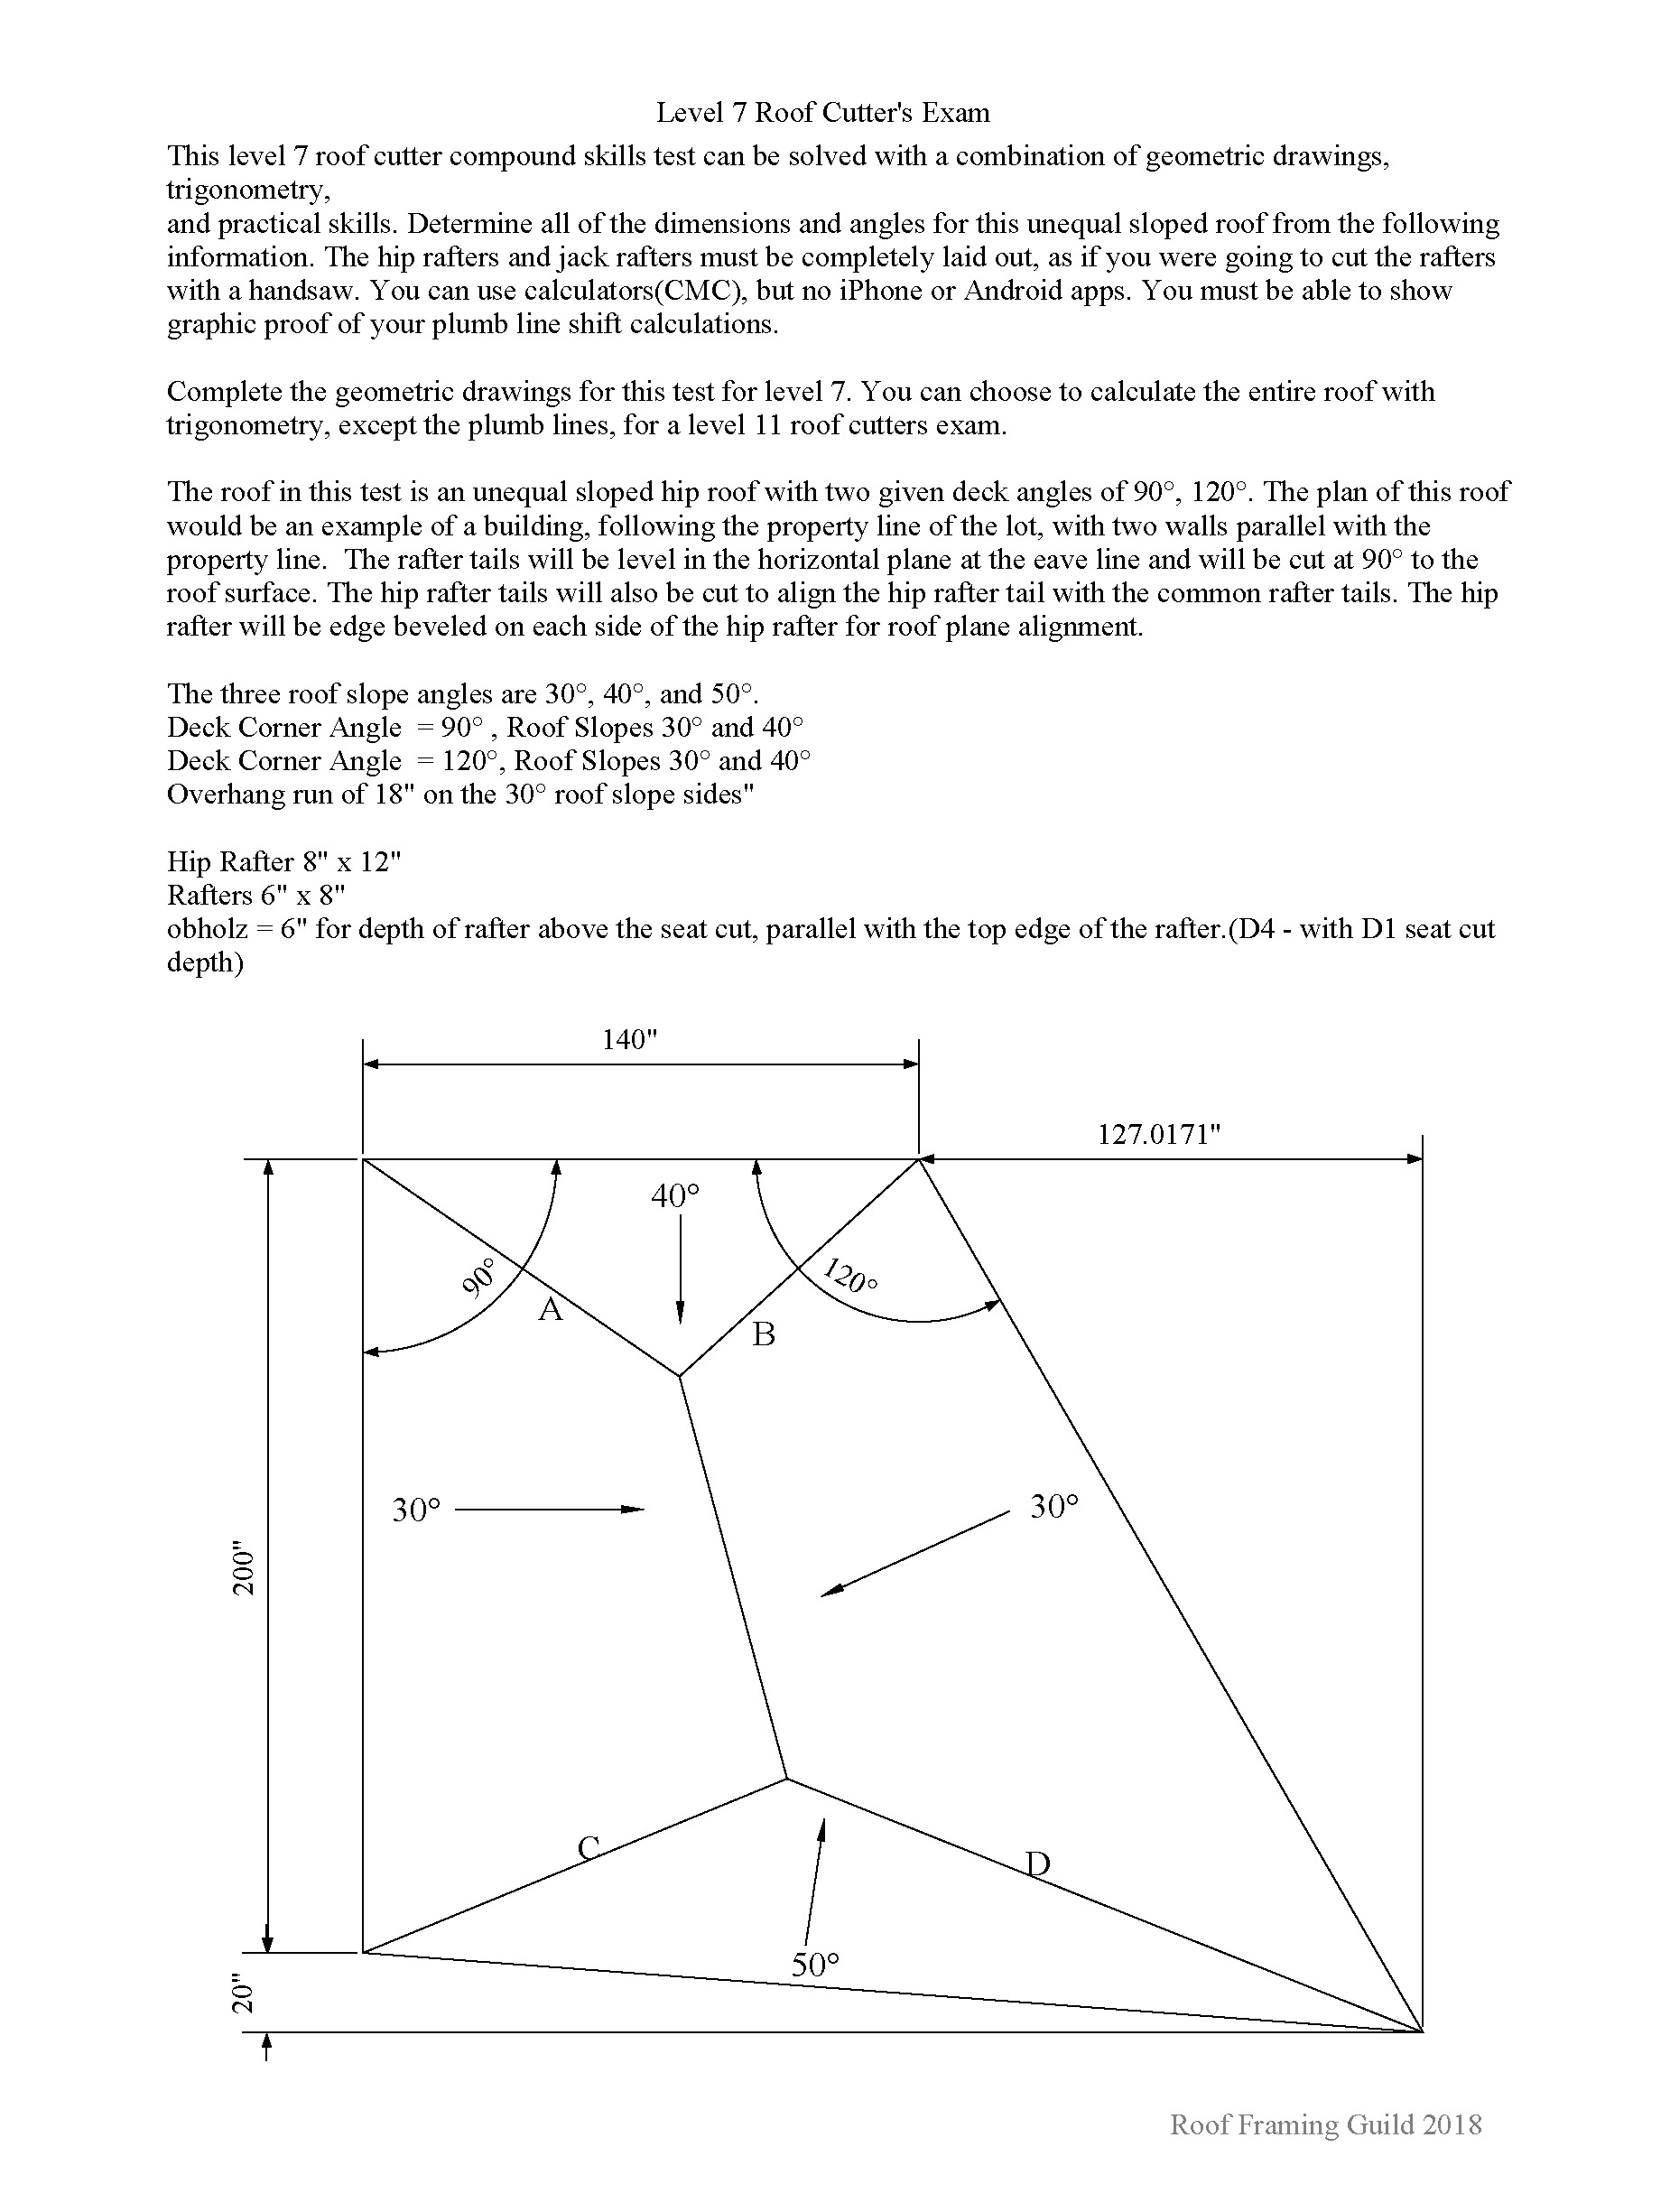

There are hundreds of ways of calculating the required information to cut rafters. Everyone has there own style in laying out and cutting the rafters. The main focus of these exams and study guides are to present a standard base, that can be used to gauge the level of the roof cutter's ability. The roof cutter can use a combination of geometric drawings, trigonometry, framing square, and practical skills to complete these exams. These exams follow the WorldSkills carpentry competition layout format. The main focus of these exam are transferring plumb line dimensions from a plan view drawing to the timber that automatically, develops the top bevel angles on the timber.
The WorldSkills carpentry competition layout format : your saw blade bevel angle can not define the compound cut. It must be completely laid out, before the saw is used to cut the compound cut on the timber.
Most of these exams can be completed on the job site. By drawing a plan view drawing of the hip rafters on a 48" x 48" piece of plywood. The plan view drawing of the hip rafters and jack rafters must be drawn to the correct width of the material. However, the length of the hip rafter run in plan view does not need to be the true length of the hip rafter. The plan view drawing on the piece of plywood is only used to transfer the plumb line dimensions to the timber. You should use your CMC calculator to calculate the true lengths of the rafters.
We have included some geometric drawings for the development of the purlin rafter miter and bevel angles. There are roof cutters that will have never cut a purlin rafter before these exams. The purlin rafter drawings in each of the exams should hopefully help with your exam. Purlin rafters, frieze blocks that install next to a hip or valley rafter, square tail fascia, and horizontal crown molding all have the same miter and bevel angles. An understanding of purlin rafter miter and bevel angles is mandatory to pass any of these exams.
In most of the exams we have included the TFG - Roof Framing Kernel geometric development for the purlin miter angle and the SBBA for purlin rafters and square tail hip rafters. This geometric development can be developed with just a framing square. This works on all plan angles with equal pitched roofs or unequal pitched roofs. This should be studied and drawn out on a piece of plywood. This geometric development will give you a better understanding of folding down the roof planes into a drawing that defines the different angles in a descriptive geometric drawing.
These exams also have the hip rafter purlin housing angle drawings. Even though most of carpenters will never cut the hip rafter purlin housing angle on the hip rafter, the hip rafter purlin housing angle is the same angle on the timber as the hip rafter square tail cut. You must know how to cut the hip rafters for square tails, if you want to pass these exams.
Participants taking this exam at home and building the task models must take pictures of all of their rafters before the rafters are cut. Layout the plan view of the task model on a sheet of plywood. The rafter tails will extend past the sheet of plywood. Participants must print their name, with a felt tip pen, on each rafter in the task model.
Participants that complete their task models and exams can send an email for a review of the roof cutter's exam. After review of the exam we will email you a Professional Certification Certificate for the completed level.
Hopefully, we can bring some professionalism to being a carpenter. None of us want to wear a suit and tie to work, just so we can say we are a professional. They have all sorts of Professional Certification for all sorts of professions. We just need to set a standard of what it takes to be a professional in carpentry in North America.
Send your completed roof cutter's exam to: sim@rfguild.org
Roof Framing Guild
www.rfguild.org
